I have 3 boys… which means not even 5 minutes after breakfast, they are pre-programed to start asking “Mommy, can we have a snack?” I swear you could feed them an entire cow and they’d be planning their next meal before the last bite is swallowed! I love the sweet simplicity of boys – Give them food to eat & some dirt to play with, and they’re good! =)
Needless to say, I gotta keep snacks on hand all of the time… especially snacks that are portable when we’re on the go!
Most Fruit Roll-Ups sold in stores are loaded with Corn Syrup or Sugar, Artificial Flavors, Artificial Food Coloring, and absolutely no fresh fruit whatsoever! Even the more natural Fruit Leather is expensive and made with ‘dead’ fruit (meaning it’s probably been boiled before dehydration), so the nutrients are all but gone… not to mention they’re expensive!
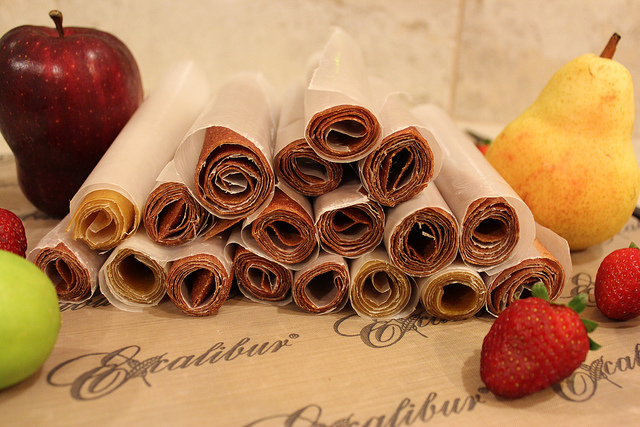
Although the variations are endless, here’s my base recipe for Raw & Natural Fruit Roll-ups… Feel free to create your own flavor masterpiece!
If you’re looking for an even easier & less expensive option, try my Quick & Easy Natural Fruit Roll Up Recipe tip using just applesauce – although you miss out on the full nutritional benefits, it’s a healthier & cheap alternative to the other stuff!
My ‘How To Make Fruit Roll Ups’ Video Tutorial:
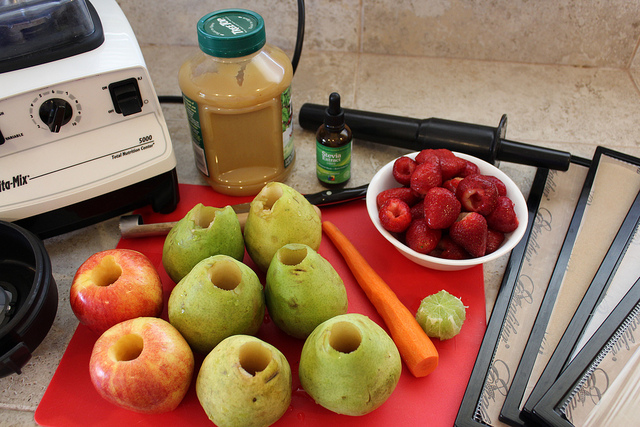
The Tools & Ingredients Used in this Recipe:

Raw & Natural Fruit Roll-Ups Recipe
- Prep Time: 10 min
- Cook Time: 4 to 8 hours
- Total Time: 23 minute
- Yield: 8 Trays 1x
- Category: Snacks
- Cuisine: Gluten Free
Description
This All Natural Fruit Roll Ups Recipe is Easy & Fun to Make… And Still Delicious without all the Sugar.
Ingredients
- 6 Pears (core removed)
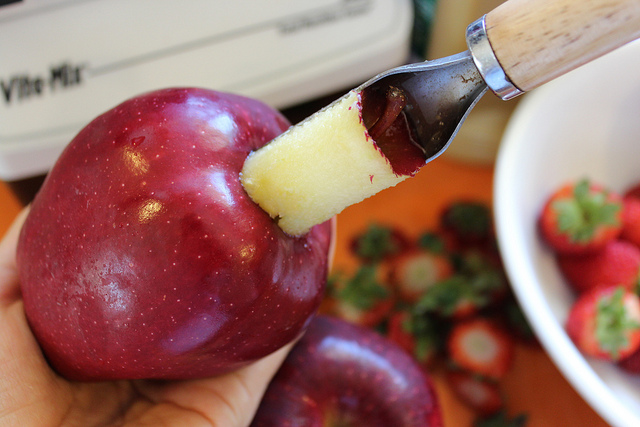
- 4 Apples (core removed) – you can also use Applesauce
- 1 lime – Peeled (or the juice from one lime) – This will help preserve the color and the fruit.
- Handful of Spinach (washed)
- Handful of Grapes
- Carrots (washed & peeled)
- Strawberries (washed & de-stemmed)
- 1/2 Banana (peeled – but, don’t over do the banana or the fruit roll-ups won’t dehydrate well and can end up sticky)
- Liquid or Powdered Stevia Extract for Additional Sweetness (use sparingly)
Instructions
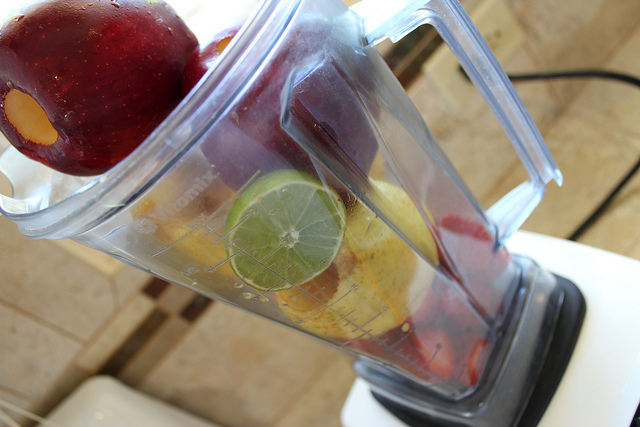
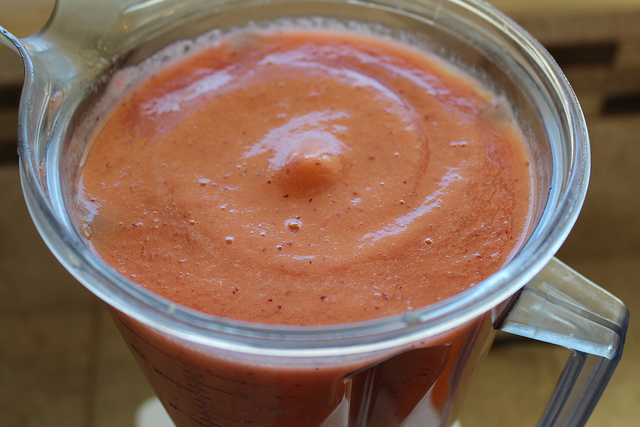
- In your VitaMix, combine fruits & veggies until pureed completely. Be sure to use Lime or Lemon to preserve the color and fruit during the dehydrating process. Citrus also adds naturally adds pectin to help bind the fruit.
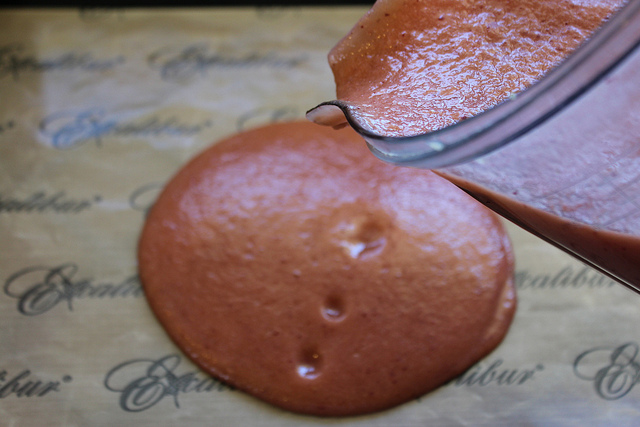
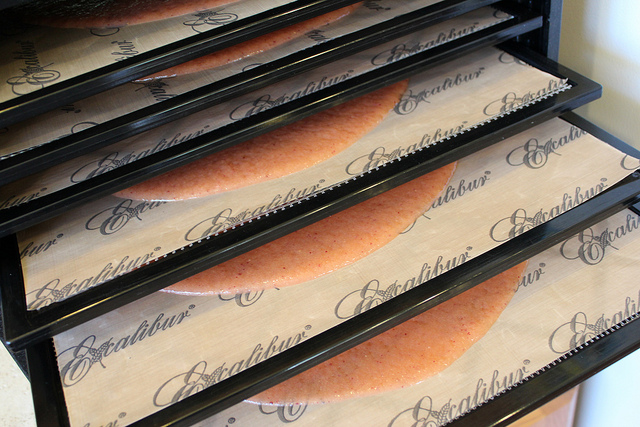
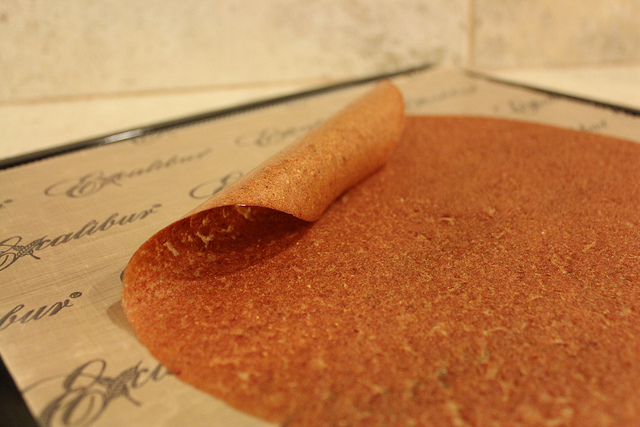
- Pour fruit mixture onto dehydrator trays lined with ParaFlexx Non-Stick Reusable Liners, parchment paper, or plastic wrap.
- Dehydrate at 115 degrees for 8-12 hours until entire Fruit Roll Up is dry, but not over dry or hard.
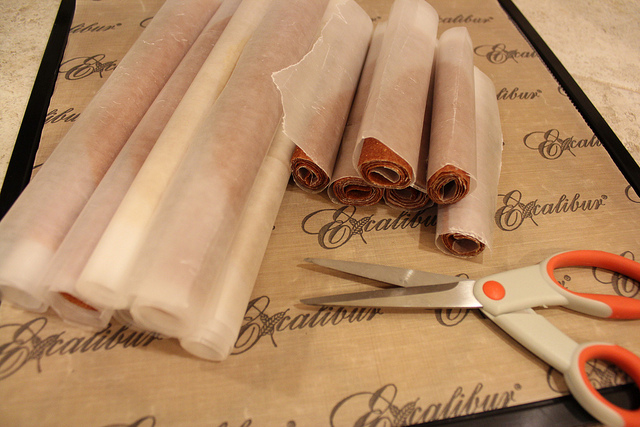
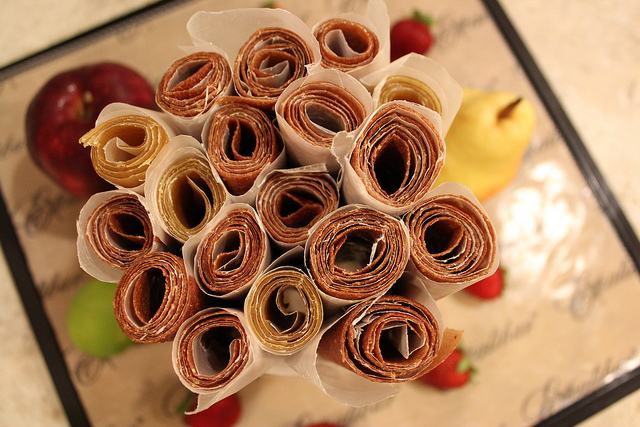
- Serve immediately or store rolled in wax paper, parchment, or plastic wrap in sealed glass container, or ziplock bag… For long term storage, use a food sealer or store in Fridge.
- If stored in container, Use within 7-10 days. Or if refrigerated, use within one month.
Notes
This recipe makes approximately 8 Large Circles (or 8 full dehydrator tray sized), but feel free to scale it in half if you don’t need so much. I cut each large circle in half or quarters before giving them to the kids… its just easier to make large ones instead of multiple small sizes for dehydration & storage.
If you don’t have a Dehydrator, you can use your Oven. Set the oven at the lowest temperature (mine is 170 degrees). Line Cookie Sheets with parchment paper & spread mixture evenly with a spatula. Dry in oven for 2-4 hours depending on your oven. Do not over dry or the Roll-up can become brittle.
- Pineapple
- Honey
- Bananas
- Citrus Fruits (other than Lemon or Lime for preservation)
- Broccoli or very Fibrous Veggies
Nutrition
- Serving Size: 1 Strip
- Calories: 30
If you don’t already have a VitaMix or Excalibur Dehydrator, I strongly encourage you to check out what these machines are capable of! For more information about VitaMix you can go directly to the VitaMix website. For free shipping, be sure to use: Coupon Code: 06-004166


Nice! Keep it up!
Awesome thank you! I just subbed 3
You’re BACK?!?!?!?
Lol… yes, I suppose I am! =) I love making YouTube videos, but as a Homeschool mama, the school year is often a busy time for us. Thanks for sticking around & for the patience while I work on more. God Bless! ~Erika
You bet.. and thx for doing what you do… I find you are a real person who posts to help others.. not like so many of these other RAW food youtube “celebs”… God Bless to you too Erika…
Thanks for the saran wrap tip!!
You’re welcome! It saves a lot of time on clean-up too! =) God Bless! ~Erika
I thought heat over 110 degrees killed the enzymes, no?
Good Question! Generally food can handle higher temps without much nutrient loss, since the moisture in the food itself acts as a cooling agent. Much like sweaty people on a hot day. =) So I typically dry my wet food at 125-135 degrees for the first hour and drop it to 115 degrees for the remaining time. I also live in a very humid environment, so you need to take that into consideration to avoid food spoilage. Hope that helps! God Bless! ~Erika
Happy Mother’s day!! great recipe thanks for sharing :o)
Thank you! =) God Bless! ~Erika
Hi, I have some problems with fruit roll ups. Sometimes they are great, sometimes they made problems.
I have tried thinner and thicker fruit roll ups. Some times it get flaws and I have problems to take it from the dehydrate foil. I can see it on your pictures here with apples. This can make problems with the pull up.
Also I did not now when is the right time to pull it up. Can they be to dry?
I have some thin apple fruit roll up that is more dry and it is more like paper.
Banana fruit leather that was more thick is a little bit sticky. Both taste very well :-)
The last fail fruit ups with apple has some water, because I could not shake it to spread it.
I have an Excalibur mini that have 220 Watts. The german distributor says that I needs 2-3 hours more than the big Excalibur.
I am glad for every tipp. More success, more activities in the kitchen with raw foods(and more energy) ;-)
I don’t have a Vitamix, do you think a Nutribullet would work similarly?
I just came across your sight, it’s wonderful! As a kid my favorite memory was grocery shopping and stopping by the deli counter for apricot fruit roll UPS. They were very thin and a tart sweet. I have found nothing that compares. Do you have a recipe that I might try? Thanks
Oh my gosh Anne, I have a very similar memory and apricot was also my favorite! I can still taste it in my minds eye. I’ve not tried reproducing the apricot fruit roll ups yet, but I’d start with fresh/ripe apricots and use fresh grapes (or grape juice concentrate) for sweetness. Don’t forget a tiny splash of lemon to help preserve it naturally. Pour it thin on the dehydrator tray and see what you think… hopefully it will be reminiscent of the one you remember, but without the corn syrup and sulfites. God Bless! ~Erika
I’m surprised you keep the Apple and other fruit peels right on when you puree them?
Hi! Yes, that’s the beauty of owning a Vitamix… you can keep all of the wonderful, nutritious peels (even orange seeds) in there & it still comes out smooth! =) God Bless! ~Erika
Loved your fruit rollup/leather video. Though I’ve made leathers for 20+years, there’s always lots to learn.
I’m wondering if you have any tips for making leathers from grape juice (no sugar). I made a batch last night; just took it out of my Excalibur dehydrator and it’s tacky and difficult to roll.
I’ve always used wax paper with my roll ups but plan to take your tip and use stretch wrap on my dehydrator trays.Do you blend any other fruit or vegetable with the grapes (Concord less seeds, of course).
Thank you for your time and expertise.
Hello Erika,
I enjoyed watching your wonderful video about fruit roll ups. You make it look so easy!
So I bought a 9-tray Excalibur and have been trying to make fruit leather. I have tried about 5 times and the results are very inconsistent. I puree the fruit and then spread it on the Paraflexx sheets, in a uniform layer (I fill up the sheets). The sides dry quicker then the center – I always seem to get a wetter area in the center. I tried turning the trays around – 180 degrees – half-way through the drying time and it doesn’t seem to help. Also, it seems that the top trays dry faster than the bottom ones. What am I doing wrong? Please help. Thank you.
Hi Solomee, It sounds like maybe your Excalibur isn’t warming up? This happened to me when I first got mine several years ago & it is a known issue. The heating element comes lose during shipping & has to be (easily) reset. I’d call Excalibur – they are amazing & should be able to help you with this. God Bless! ~Erika
Thanks a lot Erika for your reply. I will have it checked. All the best!
I tried fruit roll ups but it stuck to the parchment paper. 6 hrs
I used the plastic that came with the dehydrator for sunflower seeds at the same time.
I don’t like the idea of using saran wrap on the trays touching the food
Hi Janet! It depends on what mixture of fruits you use…. some fruits/ingredients never dehydrate fully (like pineapple, honey, etc.), and will be sticky. I like the Paraflexx sheets that come with the dehydrator best, but you can always use the non-stick side of freezer paper, wax paper or plastic wrap. =) God Bless! ~Erika
I have an abundance of plums – can they be directly substituted for the strawberries in this recipe? Also, what can be used to sweeten it up a bit if honey is not an option?
Great questions Janice! Plums dehydrate fantastically, but they will not dehydrate the same way strawberries will… They will stay sticky, just like the prunes do. However, feel free to add them in small quantities as a sweetener. Alternative sweeteners that can be used in place of honey are: Regular Sugar, Agave Syrup, Coconut Syrup, Dates, Stevia, Bananas – and just about any sweet fruit. Just bare in mind that some sweeteners don’t dehydrate all the way and stay sticky – so I’d start with just a little and see how it goes. Hope that helps. =) God Bless! ~Erika
Hello , please I need ur help . Whenever I put pineapple purée to have rolls at the end . I find them crispy and can t roll them up?
Despite that I try directly turning off the dehydrator after testing the purée
Thank u