Description
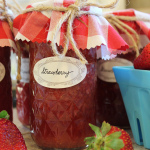
This Strawberry Jam Recipe gives you the option to use little to no sugar. Because of Pamona’s Pectin, you can also use any type of sugar substitute, making it much healthier than other recipes.
Ingredients
Scale
- 5 pounds fresh strawberries (5 quarts) – or frozen fruit that has been defrosted. This should make approx. 8 cups of mashed strawberries for your Jam.
- 2 1/2 Cups 100% Apple Juice Concentrate (You may also use Real Sugar, No Sugar, or Any Sugar Substitute – including Agave, Stevia, Honey, Maple Syrup, Evaporated Cane Juice, Orange Juice, etc… Here is the link to Pomona’s Printable Instructions for ideas on how to use these sugar substitutions. I’d also recommend that you adjust the recipe to ensure you are not over or under sweetening the mixture.
- 5 teaspoons Calcium Water (You’ll find the packet of calcium in every box of Pomona’s Pectin – to make it, you’ll need to add 1/2 teaspoon of Calcium Powder to 1/2 cup of water – shake well and store any leftovers in fridge for use later.)
- 5 teaspoons of Pomona’s Pectin – since I’m using Juice Concentrate, you’ll have to follow the Liquid Sweetener boil directions below (and in the video) – Or, you can use the other Dry Sweetener / Pectin instructions below:
Instructions
Preparing Your Tools:
- Wash and rinse your Jars, new Lids & Rings.
- Place Lids in a small sauce pan with approx. 1″ of Water and bring to a simmer on your stove top. Then turn the heat down to keep the Lids warm until canning. Set-Aside your Rings for use during the canning process.
- Place your Canning Jars in a Water Bath Canner (or large stock pot fitted with a rack at the bottom) that will hold all of your Jars.
- Fill your Canner with Water… being sure to fill your Jars and cover them with at least 1″ of Water over the tops. Set on your stovetop & bring water to a boil.
- Sterilize the Jars for 10 minutes, then turn down heat and let Jars stand in hot water until the canning process.
Preparing Your Ingredients:
- Prepare the Calcium Water. To do this, combine 1/2 teaspoon Calcium Powder (included in the Pomona’s Universal Pectin package) with 1/2 cup water in glass storage container. Mix well & Shake again before using. You will have extra Calcium Water than you need for this recipe, so be sure to store it in the fridge for use again later.
- Wash Strawberries and remove stems.
- In a large bowl, Mash the 5 Quarts/Pounds of Strawberries with a Potato Masher or Use your VitaMix to blend them to your desired consistency. (keep the Variable Speed low 1-3). You should end up with approximately 8 Cups of Mashed Strawberries with Juice.
Preparing Your Jam Mixture:
- Pour the Strawberries into a large stock pot or pan.
- Add 5 tsp. of the Calcium Water to the Strawberries and mix together well.
- Bring the Strawberry Mixture to a boil, then add in your Sugar / Pectin Mixture from below:
- FOR DRY SUGAR or DRY SWEETENER RECIPE ** = In a small bowl, combine your 2 1/2 Cups Dry Sugar or Alternative Dry Sweetener with the 5 tsp. Dry Pectin Powder & mix well – set aside.
- FOR LIQUID SWEETENER RECIPE ** = Place 2 1/2 Cups Apple Juice Concentrate or other Liquid Sweetener into a Medium Sauce Pan and bring to a boil. Once boiling, transfer it to your VitaMix Container and with the Variable Speed at 1, add in 5 tsp. of the Dry Pectin Powder and blend on Variable Speed 3-4 for 1 Minute.
- FOR NO SUGAR or NO SWEETENER RECIPE ** = Reserve 1 Cup of the Strawberry Juice & follow the Liquid Sweetener Instructions above for boiling.
- Once your Sugar/Pectin has been added to the Strawberry Mixture – mix it well for 1-2 minutes. The mixture will begin to foam a little as you return it to a full boil.
- Once the Jam mixture returns to a boil, remove the pot from the heat.
** IMPORTANT NOTE: Every alternative sweetener has it’s own range of sweetness… For example Stevia can be extremely concentrated and may require teaspoons instead of cups in measurement. So, be sure to adjust the recipe accordingly! Experimenting with recipes is always fun, but when in doubt, test a small amount first – so you don’t waste an entire batch. **
The Canning Process:
- Using your Canning Tongs, carefully remove a hot Jar from the Canner; being sure to empty all of the hot water from the Jar back into the pot.
- Using your ladle, fill the Jar with the Jam, leaving ¼ inch of headspace – you can also use your canning measuring tool to check the headspace.
- Wipe the rims of your Jar with a clean towel.
- Using your tongs or a magnetic Lid wand to remove the lids from the hot water and place a Lid on your Jar.
- Screw on a Ring/Band until just finger tight – don’t over tighten, or the air won’t be able to escape the Jar during the canning process.
- Place the Jar back the into the Canning Bath / Pot.
- Repeat the above steps until all Jars have been filled and placed back into the pot.
- Return the Canner/Pot to a rolling boil, and boil for 10 minutes. Be sure to add 1 minute of additional boil time for every 1000 feet you are above sea level.
- After boiling, turn off the heat and allow your Canner and Jars to rest for 5 minutes.
- Using your Canning Tongs, remove the Jars from Canner onto a Wire Rack for cooling. As the Jars hit the cooler air, you should begin to hear the ‘pop’ sound as the Lids seal… but this doesn’t always make an audible sound, so be sure to check them later to confirm that the Jars have sealed properly.
- Allow your Jam to rest undisturbed for 12-24 hours.
Notes
Tips & Tricks:
- If the Fruit separated from the Jelly during the canning process, that’s ok… Just flip your Jars upside down every couple of hours while they are setting and the Jam will re-blend and turn out perfectly!
- If done properly, your Jam should store on the shelf for approximately 1 year.
- Refrigerate any opened Jars for 1-3 weeks to avoid spoilage.
- If any of your Jars didn’t seal properly, that’s ok… Just be sure to store the cooled Jars in the Refrigerator for 1-3 weeks or Freeze for longer so it doesn’t go to waste!
Nutrition
- Serving Size: 1 Tablespoon
- Calories: 13