Description
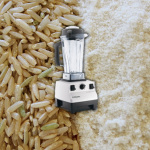
Your Vitamix can do much more than make smoothies… It can also make Flours out of Whole Grains. Here’s How to Make Your Own Rice Flour in the Vitamix with Video Tutorial.
Ingredients
Scale
- 1/2 Cup Brown, White or Multi Grain Rice
Instructions
- The Vitamix is powerful! Grinding grains can cause the grains to heat up… For best results, put your Rice Grains into the Freezer for about 15-30 minutes before blending to avoid overheating the flour.
- Place the Whole Grain Rice into the Vitamix – The Vitamix 32 Ounce Dry Blade Container works the best, but you can use the Vitamix Standard Wet Blade Container… just be sure it is completely dry (inside & out) before using.
- Starting at Variable Speed 1, Working your way quickly to Variable Sped 10, and on to High.
- After you start to see the Rice crush into flour, stop the Vitamix and give the Rice a quick stir with the blunt edge of a knife or spatula. This will make sure that everything is blended evenly.
- Repeat the blending steps again, until you see the Rice Flour smooth and evenly ground inside the container.
- Let the Rice Flour cool before storing it in an airtight container.
Notes
Do NOT grind wet/soaked rice without making sure it is completely dry unless you plan to use it immediately after grinding.
Nutrition
- Serving Size: 1 Cup
- Calories: 575
