Description
This Easy Coconut Milk Yogurt Recipe – NO Dairy, Gluten, Nuts or Sugar! I also have a Vegan Version that’s made without Gelatin.
Ingredients
- 2 Cans of Regular Coconut Milk (13.5 ounce cans – NOT the low fat kind) – Set aside ¼ cup.
- 2 Tablespoons Honey (I use local, raw honey)
- 1 Tablespoon Unflavored & Unsweetened Gelatin (I like the Great Lakes Brand but the Knox brand works great too)
- 1 Packet (which is ⅛th tsp) Yogurt Culture Starter (I use a Vegan variety by Culture’s for Health – this means the yeast culture is not grown on dairy products)
Instructions
- Sterilize your mason jars & lids – I wash everything in the dishwasher the night before and they are good to go. I use 2 Pint sized jars per batch (16 ounces each). If you don’t have time to dishwasher or boil your mason jars, wash them well, and then place them with a little water in the microwave for 1 minute – but warning, they will be hot!.
- Take ¼ cup of the Coconut Milk and add the Gelatin to it. Let it bloom for 7-10 minutes while you prepare the rest of the ingredients.
- Pour the remaining Coconut Milk in a Medium Sized Saucepan and whisk together well over Medium heat until the mixture reaches a temperature of 140-150 degrees (this takes about 5-7 minutes). This is just hot enough to kill any bacteria (bad or good) that would compete with the good yogurt cultures and prevent the yogurt from setting up. Don’t freak out if you go over the temp (like I did the first time), just be sure to let it cool to 110 degrees before adding your cultures.
- Remove pan from heat and whisk in the Honey & Gelatin in Coconut Milk.
- Whisk every couple of minutes until the temperature drops down to 110 degrees (takes about 15 minutes).
- At 110 degrees, it’s safe to whisk in your Yogurt Culture – just whisk briefly until well incorporated.
- Pour the Yogurt mixture (still runny) into your clean mason jars; cover with lids; and screw the bands on.
- Place the jars into your Dehydrator (with the trays removed) or Yogurt Maker and set the temp to 110-115 degrees.
- Let the Yogurt culture (or ferment) overnight or for approx 18 hours in the dehydrator. The Yogurt will still be runny & separated at this point… that’s ok.
- Put the jars into the fridge to cool & stop the culturing process. After 4-6 hours in the fridge, check on the Yogurt and see if it is firming up. Once it’s firm, whisk it well and store it in the fridge until you’re ready to eat it! It will continue to firm up a little in the fridge even after whisking.
- We eat everything, but you can discard the excess liquid at the bottom if you want a super thick Coconut Cream Yogurt … it’s almost as thick as cream cheese this way – a great substitute!
- See Flavoring & Serving suggestions below.
Notes
FLAVOR & SERVING IDEAS:
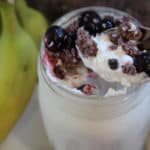
I recommend stirring in your flavors (natural fruit preserves, chocolate, vanilla, dried fruit) or toppings (granola, fresh fruit, nuts/seeds) right before you eat it.
Chocolate Coconut – Stir in Unsweetened Cocoa Powder with a little Vanilla Stevia (start with 2 drops and work up from there). Top with fresh Strawberries, Bananas or Cherries. This is my favorite!
Strawberry Swirl – Mix in a tablespoon on your favorite Strawberry preserves and serve with your favorite Granola.
Ch, Ch, Ch, Chia – Mix with Fresh Blueberries, Vanilla and a teaspoon of Chia Seeds.
Pina Colada – Mix with Strawberries and Pineapple – topped with shredded Coconut. A-L-O-H-A!
Fruit Dip – Use the Yogurt with your choice of mix-ins a a yummy fruit dip.
Frozen Yogurt – Make your favorite flavors into a yummy frozen treat or popsicle!
Sweetening – For added sweetness, try a little Maple Syrup, extra Honey or Liquid Stevia (which there are several flavor options) – but, start with just one drop and work your way up from there.
This Yogurt can be used 1 for 1 in any of your favorite yogurt recipes.
TIPS:
Occasionally yogurt seems to go wrong… Sometimes it’s my fault (like the time I didn’t let it cool properly and killed the culture). But, sometimes its a combination of things – Here’s a couple of tips & ideas on what might have gone wrong and if you can salvage the batch.
1. Stick to the Recipe – Modifications are great when it comes to the Mix-Ins & Flavors, but the recipe itself shouldn’t be modified unless you really know what you’re doing.
2. Don’t add the Cultured Yogurt Starter until the temperature is at 110 degrees throughout the batch… any higher and you will kill all those wonderful bacteria… meaning you’ll just have thick coconut milk and no yogurt cultures. If this happens, it’s still edible, so don’t throw it out!
3. Don’t under/over culture the yogurt – Unless you know what you’re doing, you risk spoiling a yummy batch of yogurt by not letting it culture long enough or over-culturing it and having it go bad. I never culture for less than 12 hours and no more than 24 hours before placing it in the fridge.
4. Mixture is too runny, even after 6+ hours in the fridge – This doesn’t necessarily mean your whole batch is bad, it may just mean the Gelatin didn’t set correctly, or was measured incorrectly. It also can mean that there wasn’t enough Coconut Cream in the can you bought… Be sure you’re using the FULL FAT Coconut Milk and not the low fat kind. You can also try straining out the excess liquid that separates from the fat through a sieve.
5. Educate yourself on Cultured & Fermented Foods – They are amazing! To learn even more about making your own yogurt, visit Cuture’s for Health website – they have a TON of amazing resources for Yogurt, Sourdough Starters, Fermenting, Kambucha and more! I love these folks! They even have a live chat where you can ask questions about using their products to make your recipes!
Nutrition
- Serving Size: 1 Cup
- Calories: 100