 The first time I made Homemade Coconut Milk Yogurt, I was kinda freaked out…”What if I create a pulsating blob of bad bacteria that my kids eat and get sick?” But, then I tried it and felt really silly for thinking I needed a lab coat or an iron gut.* The truth is, making your own yogurt is really easy… Plus, it’s so much better tasting and far healthier than the store-bought kind!
*** If you’re looking for my VEGAN Coconut Yogurt Recipe… it’s over HERE. ***
There are many varieties of Yogurt you can make, but I chose Coconut Milk because it is so full of flavor, healthy fats & is usually very well tolerated even by people with Tree Nut allergies. You can flavor & top it with just about anything and it tastes amazing!
* All joking aside, you really do need to be careful that everything is properly washed and cleaned before beginning. You don’t want to introduce any bad bacteria that could ruin your yogurt!
My favorite starter is Culture’s For Health – Vegan Yogurt Starter (1 box has enough for 8 Yogurt batches) – You can use this culture for making Almond Yogurt too! Technically, you can also use the contents of a good pro-biotic capsule to start your culture, but I like knowing I’m starting with fresh, correct cultures to ensure the greatest chance at a successful batch.
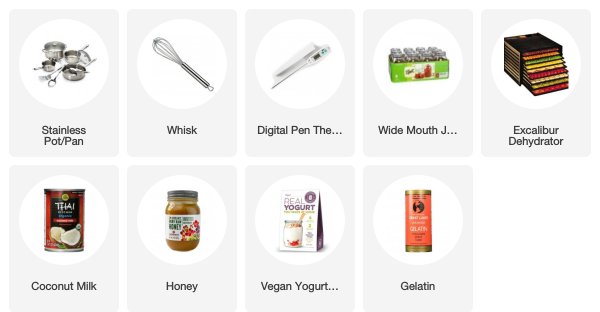
The Tools & Ingredients Used in this Recipe:
Easy Coconut Milk Yogurt Recipe
- Prep Time: 25 mins
- Cook Time: 24 hours
- Total Time: 24 hours 25 minutes
- Yield: 1 Quart (4 Cups) 1x
- Category: Snacks
- Cuisine: Gluten Free
Description
This Easy Coconut Milk Yogurt Recipe – NO Dairy, Gluten, Nuts or Sugar! I also have a Vegan Version that’s made without Gelatin.
Ingredients
- 2 Cans of Regular Coconut Milk (13.5 ounce cans – NOT the low fat kind) – Set aside ¼ cup.
- 2 Tablespoons Honey (I use local, raw honey)
- 1 Tablespoon Unflavored & Unsweetened Gelatin (I like the Great Lakes Brand but the Knox brand works great too)
- 1 Packet (which is ⅛th tsp) Yogurt Culture Starter (I use a Vegan variety by Culture’s for Health – this means the yeast culture is not grown on dairy products)
Instructions
- Sterilize your mason jars & lids – I wash everything in the dishwasher the night before and they are good to go. I use 2 Pint sized jars per batch (16 ounces each). If you don’t have time to dishwasher or boil your mason jars, wash them well, and then place them with a little water in the microwave for 1 minute – but warning, they will be hot!.
- Take ¼ cup of the Coconut Milk and add the Gelatin to it. Let it bloom for 7-10 minutes while you prepare the rest of the ingredients.
- Pour the remaining Coconut Milk in a Medium Sized Saucepan and whisk together well over Medium heat until the mixture reaches a temperature of 140-150 degrees (this takes about 5-7 minutes). This is just hot enough to kill any bacteria (bad or good) that would compete with the good yogurt cultures and prevent the yogurt from setting up. Don’t freak out if you go over the temp (like I did the first time), just be sure to let it cool to 110 degrees before adding your cultures.
- Remove pan from heat and whisk in the Honey & Gelatin in Coconut Milk.
- Whisk every couple of minutes until the temperature drops down to 110 degrees (takes about 15 minutes).
- At 110 degrees, it’s safe to whisk in your Yogurt Culture – just whisk briefly until well incorporated.
- Pour the Yogurt mixture (still runny) into your clean mason jars; cover with lids; and screw the bands on.
- Place the jars into your Dehydrator (with the trays removed) or Yogurt Maker and set the temp to 110-115 degrees.
- Let the Yogurt culture (or ferment) overnight or for approx 18 hours in the dehydrator. The Yogurt will still be runny & separated at this point… that’s ok.
- Put the jars into the fridge to cool & stop the culturing process. After 4-6 hours in the fridge, check on the Yogurt and see if it is firming up. Once it’s firm, whisk it well and store it in the fridge until you’re ready to eat it! It will continue to firm up a little in the fridge even after whisking.
- We eat everything, but you can discard the excess liquid at the bottom if you want a super thick Coconut Cream Yogurt … it’s almost as thick as cream cheese this way – a great substitute!
- See Flavoring & Serving suggestions below.
Notes
FLAVOR & SERVING IDEAS:
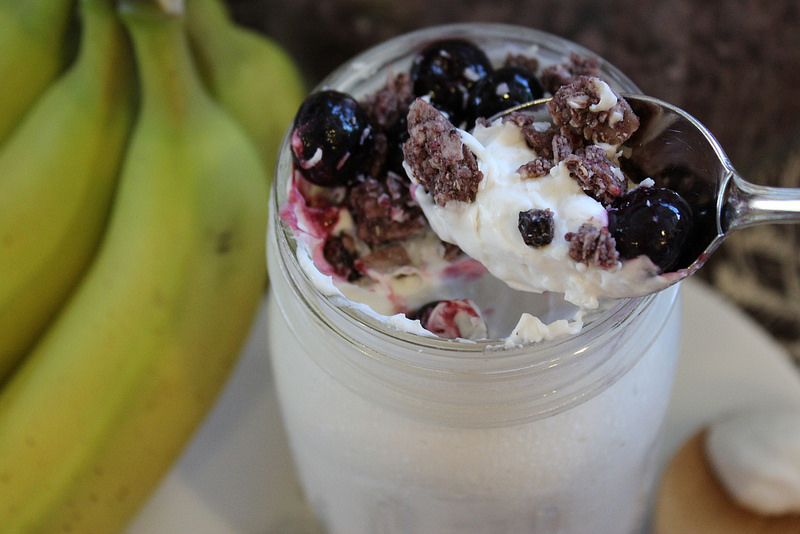
I recommend stirring in your flavors (natural fruit preserves, chocolate, vanilla, dried fruit) or toppings (granola, fresh fruit, nuts/seeds) right before you eat it.
Chocolate Coconut – Stir in Unsweetened Cocoa Powder with a little Vanilla Stevia (start with 2 drops and work up from there). Top with fresh Strawberries, Bananas or Cherries. This is my favorite!
Strawberry Swirl – Mix in a tablespoon on your favorite Strawberry preserves and serve with your favorite Granola.
Ch, Ch, Ch, Chia – Mix with Fresh Blueberries, Vanilla and a teaspoon of Chia Seeds.
Pina Colada – Mix with Strawberries and Pineapple – topped with shredded Coconut. A-L-O-H-A!
Fruit Dip – Use the Yogurt with your choice of mix-ins a a yummy fruit dip.
Frozen Yogurt – Make your favorite flavors into a yummy frozen treat or popsicle!
Sweetening – For added sweetness, try a little Maple Syrup, extra Honey or Liquid Stevia (which there are several flavor options) – but, start with just one drop and work your way up from there.
This Yogurt can be used 1 for 1 in any of your favorite yogurt recipes.
TIPS:
Occasionally yogurt seems to go wrong… Sometimes it’s my fault (like the time I didn’t let it cool properly and killed the culture). But, sometimes its a combination of things – Here’s a couple of tips & ideas on what might have gone wrong and if you can salvage the batch.
1. Stick to the Recipe – Modifications are great when it comes to the Mix-Ins & Flavors, but the recipe itself shouldn’t be modified unless you really know what you’re doing.
2. Don’t add the Cultured Yogurt Starter until the temperature is at 110 degrees throughout the batch… any higher and you will kill all those wonderful bacteria… meaning you’ll just have thick coconut milk and no yogurt cultures. If this happens, it’s still edible, so don’t throw it out!
3. Don’t under/over culture the yogurt – Unless you know what you’re doing, you risk spoiling a yummy batch of yogurt by not letting it culture long enough or over-culturing it and having it go bad. I never culture for less than 12 hours and no more than 24 hours before placing it in the fridge.
4. Mixture is too runny, even after 6+ hours in the fridge – This doesn’t necessarily mean your whole batch is bad, it may just mean the Gelatin didn’t set correctly, or was measured incorrectly. It also can mean that there wasn’t enough Coconut Cream in the can you bought… Be sure you’re using the FULL FAT Coconut Milk and not the low fat kind. You can also try straining out the excess liquid that separates from the fat through a sieve.
5. Educate yourself on Cultured & Fermented Foods – They are amazing! To learn even more about making your own yogurt, visit Cuture’s for Health website – they have a TON of amazing resources for Yogurt, Sourdough Starters, Fermenting, Kambucha and more! I love these folks! They even have a live chat where you can ask questions about using their products to make your recipes!
Nutrition
- Serving Size: 1 Cup
- Calories: 100
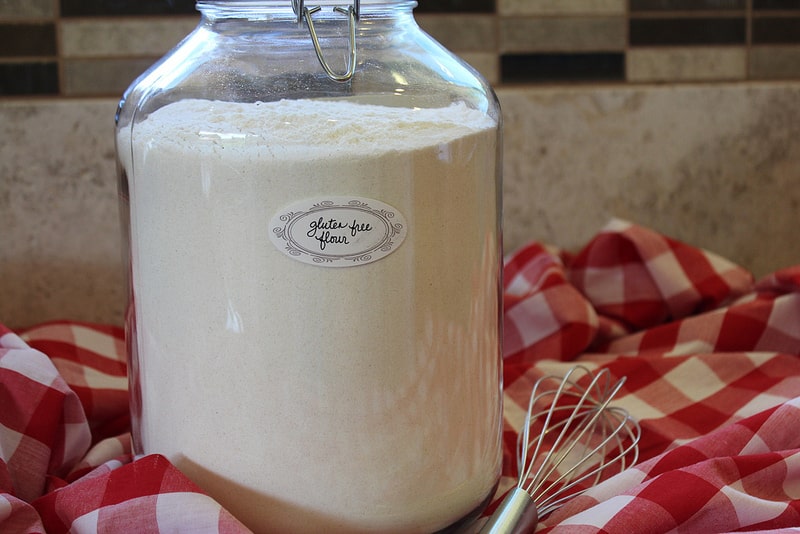
Tools & Ingredients Needed for Coconut Yogurt
Heat Coconut Milk & Bloom Gelatin

Heat Coconut Milk to 140-150 Degrees.
Remove from Heat & Whisk in Gelatin & Honey.
Cool Mixture to 110 Degrees.
Once Cooled, Add Yogurt Culture Starter
Pour Prepared Coconut Yogurt Mixture into Prepared Jars
Screw Lids On & Place in Dehydrator or Yogurt Maker.

Set Dehydrator Temp to 110-115 for 6-8 Hours
After 6-8 Hours, Yogurt Has Cultured
Mixture will still be Runny & Separated.
Place Yogurt into Refrigerator for 4-6 Hours until Firm & Set
Whisk the Yogurt in a Bowl & Return to Fridge Until Ready to Serve

Top, Serve & Enjoy!


I got all the ingredients I need to make this tomorrow and can’t wait – I have a son with eczema and want to increase the probiotic intake he gets in a non-dairy way. So this is absolutely perfect!
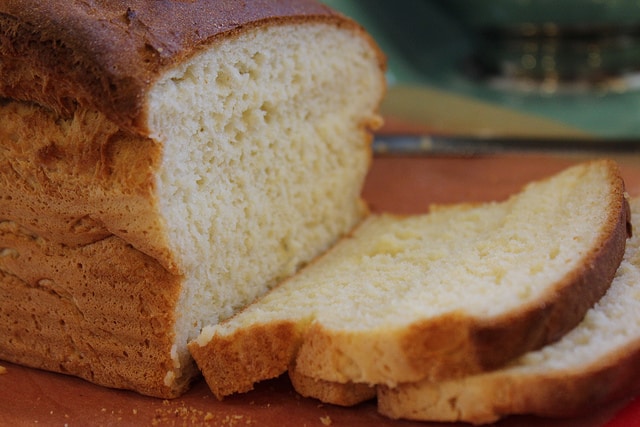
Erika, I want to thank you for sharing your talent and the way you care for your family. You are so informed and you clearly want the best for your kids and I feel the same way. Reading your blog has made it easier for me to nurture my child with delicious, healthy food and I appreciate it so much. I’ve made monkey muffins so many times (my husband loves them too!), home-made fruit rolls ups, and have enjoyed many slices of the gluten free bread recipe you’ve shared as well. It’s fun to know that I am providing my family with quality food that tastes good too -bonus!.
A Big Aloha from Florida,
Kat
gelatin is not vegan!
Yes, Diana, you make an excellent point. However, you can use agar agar for a vegan option to replace the gelatin :)
I was just thinking the same thing. I want to make this but I’d like a Cruelty-Free version. I guess substituting agar agar for gelatin in equal parts might work?
Because gelatin is not vegan, or vegetarian. It is made from ground and rendered horse hooves and bone/cartilage. Not exactly animal free.
I have a excellent completely vegan version (that’s even easier to prepare) of this that I will post soon. =) God Bless! ~Erika
Hello Erika!
Thanks for all your recipies, they are very helpful. I have a question, this yogurt can be made with almond or cashew milk instead coconut? I have tried almond yogurt several times and the flavor is not good. I used probiotics , but te flavor uhm is bad. I appreciate your advices. Blessings.
hi I dont have a dehydrater but is an oven ok to use instead.
Hi Wendy, The oven should be ok if you can keep the temp low enough… too high and you can kill the culture. One suggestion would be to warm the oven, then turn it off and wrap your pot/mason jars in a towel and keep the door shut while it cultures. Hope that helps! =) God Bless! ~Erika
Hi Erika,
I don’t own a dehydrator. What type would you recommend as a good, general one that I could use for this recipe but also for doing other items? Yours looks like a microwave yet I know it’s not one…thanks!
Hi Brenda!
I love my Excalibur Dehydrator! It’s a 9-Tray which gives me plenty of room for Yogurt or dehydrated goodies, but they make a 5-Tray if space is an issue. Hope that helps! =) God Bless! ~Erika
Have you ever multiplied your recipe? I’d like to make 4 quarts at a time. I’m curious if I’d need to use 4 times the honey and 4 packs of yogurt starter.
Hi Lauren! Yes, all of the time… We typically make 4 quarts for our large family. I multiply the sweetener just because I think it makes it taste better when using gelatin. Also,I also have a new Vegan Yogurt recipe that’s easier to make – we use tapioca starch & maple syrup in that one and you could use less sweetener since the tapioca isn’t as strong… it’s our new favorite! =) Hope that helps. God Bless! ~Erika
Thank you! I went ahead and tried it. It’s in the dehydrator now. I also used maple syrup. I used 8 cups coconut milk & 4 cups coconut butter. I’m curious to see how it turns out. It was very thick like whole cows milk. I’m feeling optimistic! Thank you for your recipe!!!
If you swap the knox gelatin for “Agar” which is a vegan gelatin, you won’t be a culprit to torture and murder of innocent trusting pigs
Hi Jane! If you’re looking for a totally Vegan Yogurt Recipe, I’ve got that over here… It only murders innocent Tapioca Starch Plants. ;) Enjoy & God Bless!