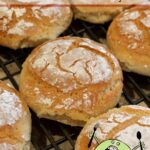
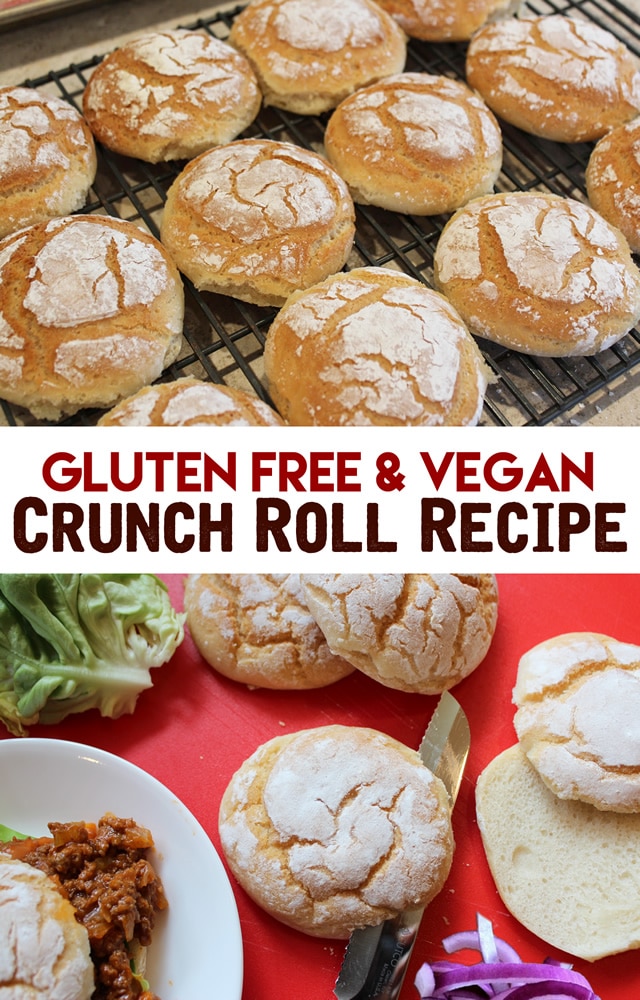
In the small town where I grew up, there was a little sandwich shop that served everything on homemade Dutch Crunch Rolls (aka Tiger Bread) and it was my favorite! I used to peel off the top of the bread and save it for last.
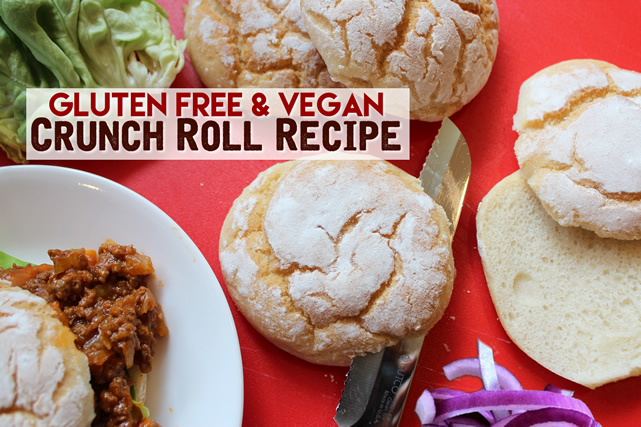
This Gluten Free Crunch Roll Recipe reminds me of those rolls… Soft on the inside, but Crunchy on the top… Perfect for Sandwiches, Burgers, Sloppy Joes, Melts & Gravies. Plus, it’s Vegan & so easy to make!
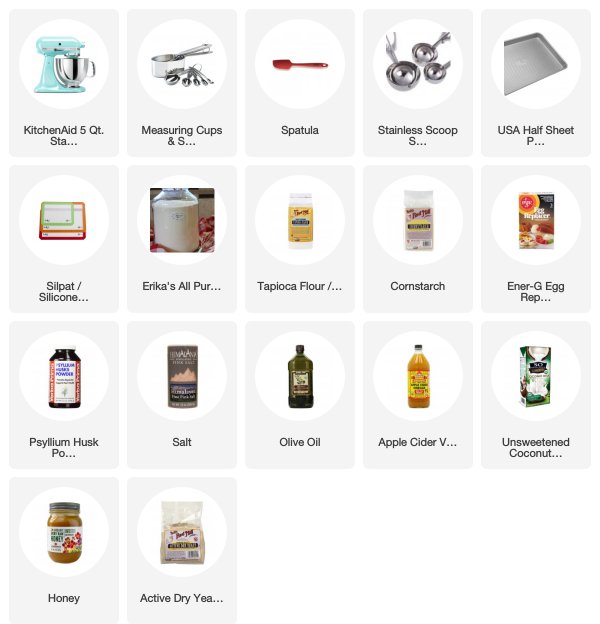
The tools & ingredients used in this recipe are:
Gluten Free Crunch Roll Recipe – Vegan!
- Prep Time: 15 mins
- Cook Time: 30 mins
- Total Time: 45 minutes
- Yield: 12 Rolls 1x
- Category: Breads
- Cuisine: Gluten Free
Description
This EASY Gluten Free Crunch Roll Recipe is also Vegan! Perfect for Sandwiches, Hamburgers, Melts, Sloppy Joes & Gravies. Soft on the Inside, but Crunchy on Top!
Ingredients
WET INGREDIENTS:
- 1 3/4 Cups Milk Alternative – Warm, but not hot.
- 3 Tablespoons Sugar or Honey
- 2 1/4 Teaspoon Dry Active Yeast
- 2 Tablespoons Extra Milk or Water* (add this ONLY if you are opting to use the Psyllium Husk Powder – omit it otherwise)
DRY INGREDIENTS:
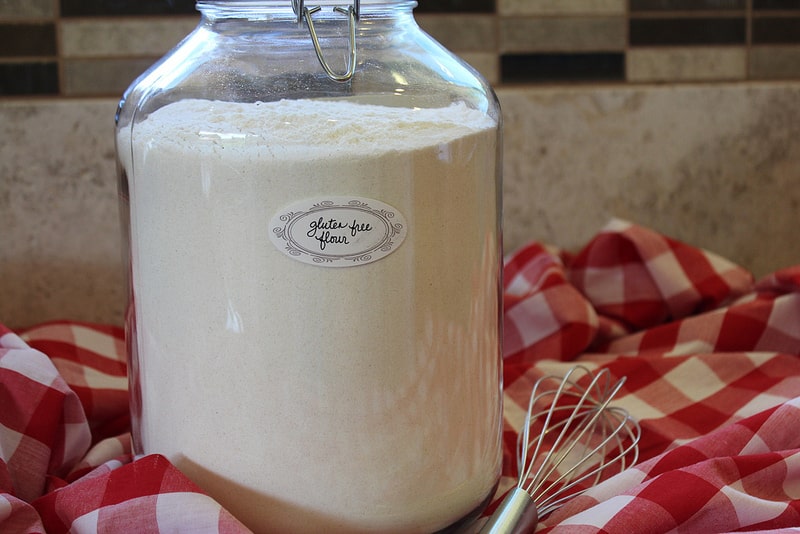
- 2 1/2 Cups Erika’s Gluten Free Flour Mix
- 1/2 Cup Cornstarch or Tapioca Starch
- 1 Tablespoon Ener-g Egg Replacer
- 1 Tablespoon Psyllium Husk Powder* (this is optional, but will help the rolls to retain their structure during the proofing/baking process)
- 1 1/2 Teaspoon Salt
ADD LAST INGREDIENTS:
- 2 Tablespoons Olive Oil
- 2 Teaspoons Apple Cider Vinegar
DUSTING
- 2–3 Tablespoons Extra Cornstarch or Tapioca Starch
Instructions
- In bowl of stand mixer, gently whisk Warm Milk, Honey & Yeast. Set-aside to proof (approx. 5-10 minutes)
- While Yeast Mix is Proofing, Whisk together your Dry Ingredients & measure out your Add Last Ingredients.
- Line a Baking Sheet with Parchment or Silpat Mat.
- Add Dry Ingredients to Proofed Yeast. Using the Paddle Attachment, mix on Low speed while adding the Oil & Apple Cider Vinegar. Continue mixing on Medium/High for approx. 2-3 minutes. The mixture will be thick & sticky (nothing like regular dough).
- Scoop approx. 1/4 cup dough onto the prepared baking sheet. I use a 1/4 cup measuring cup & spatula for this. Repeat until you have 12 dough rounds spaced about 1″ apart.
- Using well starched hands, generously dust the tops of the dough and hand shape into rounds – I think the shape resembles a hockey puck.
- Cover the rounds with a dish towel and set-aside in a warm spot to proof for approx. 20-30 minutes while oven is preheating. Don’t overproof these.
- Prepare a water bath by filling a baking dish approximately 1/3 – 1/2 full of water & place on the 2nd lowest rack in the oven.
- Preheat oven to 425 degrees Fahrenheit.
- Once Rolls are done proofing, remove the towel and place in the oven on the upper rack. Bake until the rolls are done & browned – approximately 25-30 minutes.
- Remove from oven and place rolls on cooling rack. You MUST cool these completely before splitting in half.
Notes
Using Psyllium Husk Powder:
Psyllium Husk Powder gives extra stability to gluten free breads. However, I realize not everyone has this on hand, or you may prefer not to use it… That’s ok, this recipe works with or without it (in fact the photos were taken of a batch I made without it). But, please keep in mind that your rolls may be slightly flatter/thinner than if you used the Psyllium.
Storage:
Place leftover rolls in an airtight container & store on the counter or fridge for 2-3 days. To soften rolls from the fridge, wrap in a paper towel & microwave for 15 seconds – Be sure to split/slice them open before re-heating.
Nutrition
- Serving Size: 1 Roll
- Calories: 120
Dough will be very thick & sticky… nothing like regular bread dough. Use a 1/4 Cup Cookie Scoop or Measuring Cup to measure out 12 rounds. I use a spatula to scrape the dough out.
 Space dough evenly on a lined baking sheet. One batch makes 12 Rolls.
 Dust your hands and dough well with tapioca or cornstarch and shape into rounds… think hockey pucks.
") Cover with a dish towel & set-aside to proof in a warm location. I do this right on the stove top while the oven is preheating.
Cover with a dish towel & set-aside to proof in a warm location. I do this right on the stove top while the oven is preheating. Prepare a water bath by placing water in a baking dish and placing it on one of the lower racks in the oven while it preheats. This helps keep the heat in the oven moist as the rolls bake and crack on top.
 This is what the dough looks like after proofing for approx. 25-30 minutes… Don’t over proof them.
 Place baking sheet in the oven on the top rack (above the water bath).
.") Bake rolls for 25-30 minutes until golden brown. Make sure they’re done before taking them out.
Bake rolls for 25-30 minutes until golden brown. Make sure they’re done before taking them out. Carefully separate any rolls that are stuck together & place on a rack to cool.
 Once completely cooled, slice open & serve with your favorite food.
 Perfectly Soft on the Inside & Crunchy on the Top! Enjoy! =)


Hi could you please let me know if I can use regular eggs instead of the Egg Replacer? If so then how many eggs should go in this recipe please?
use one egg.
★★★★
These look bakery-perfect! I am in awe. And healthy too? Yum!
I used chia seeds instead of the psyilium husk.You were right eventhough I put the wrong measurement of tapioca flour. I made these and a beautiful chicken pot pie.
Thank you so much.
I replaced the ener-g egg replacer with two eggs–doesn’t look good. Maybe if I’d of been smart and left out the oil and vinegar? Anyone have an answer for using eggs instead of the replacer? I need the gluten free but I’m not vegan. Thanks!
I cannot use egg replacer as it has potato starch (husband is allergic), so will use real eggs. Do I delete the olive oil and cider or just olive oil.
Hi Hope! I would keep the oil & vinegar but just reduce the liquid by 3 Tablespoons. Hope that helps! =) God Bless! ~Erika
Hi Erika — I see that your flour mix is mainly all rice flour. According to my dr. white and brown rice is 5% gluten — he gets into the dna of food — and I know I react to rice. My question is, would your recipe work using Bob’s Red Mill Gluten Free Flour? Also, would guar gum or psyiliam husks work instead of xantham gum? Thanks.
My oven is in the wall. so I’m unsure how to proof in a warm location? Can I put them in my oven on the lowest temp?
I too would prefer to use eggs – any idea how to make this work for the recipe?
What ingredient can be used in place of energy egg replacement?
Hi Karen! Are you allergic or opposed to using regular eggs? If not, you can use 1 egg and reduce the liquid by 3 Tablespoons. Others have also posted success using flax or chia eggs. Let us know how it goes! =) God Bless! ~Erika
. Has anyone tried it with success?
Hi Amy! We make these weekly & they always turn out beautiful… a couple of other people have posted their finished rolls on facebook & instagram if it helps to see the finished product. =) Enjoy & God Bless! ~Erika
Wow- thank you so much! My son has been dairy allergic most of his life, gluten free a few years and just last month we entered egg free territory. I’ve been baking a lot of test ‘bricks’ the past few weeks, trying different recipes, and stumbled upon your site. Tried this recipe tonight with great results – a keeper!
Hi can I use water instead of milk replacer …. daughter can’t have milk and I don’t have any milk replacer in the house.
Hi Ruth! Water may cause the mixture to be a little more runny, so be aware of that. As for the Milk Replacer, I just use whatever Milk Alternative I have on hand (typically Boxed Coconut Milk) – but you can use any other kind. Hope that helps. Enjoy & God Bless! ~Erika
Perfect! Made these as written. second time i have made these and they were even better this time as I made them a little too big last time. these are amazing and are great as a bun for hamburger or even sliced meat! thank you so very much for this recipe!!!
★★★★★
Thanks Karen! So glad you enjoyed the recipe… it’s definitely a family favorite of ours too. =) Enjoy & God Bless! ~Erika
I would love it if you could come up with a Gluten Free, vegan English Muffin.
The one’s I have tried from the store are so dense.
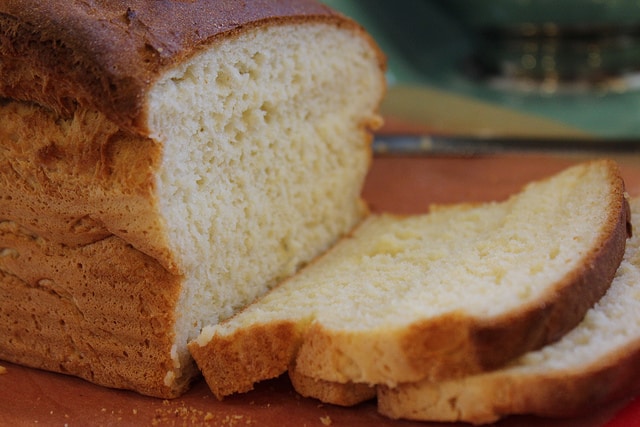
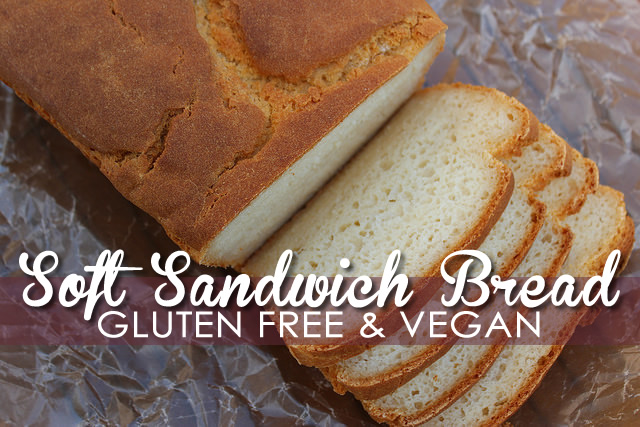
I’ve made these as rolls and last week I tried it as a loaf of bread. It went great! I increased the cooking time to ~40 min. At the 20 min. mark I covered the loaf with aluminum foil as it had already nicely browned and I decreased the temperature to 375*F. I did not use the psyllium husk OR coat the top with tapioca starch.
The taste is better as a roll, but the texture in the loaf is incredible! It’s just like eating wheat bread and has thus far been best for grilled cheese sandwiches <3 Makes 12 good sized slices.
Flavor as a loaf and stickiness of adding tapioca starch are the only thing keeping this from being 5-star for me. I'd give it a 4.5 if I could.
★★★★
OMG! I just made these & they came out perfect! I have been searching for a Gluten Free Hamburger Bun Recipe for a long time & finally found a recipe that works. I wet my hands a little so I could smooth out the tops and then sprinkled sesame seeds on top. Even my husband ate them and said they were delish! Thank you!!!
★★★★★
•4 cups white rice flour
•2 cups tapioca flour/starch
•1½ cups potato starch
•1½ cups almond flour
•¾ cups sweet rice flour
•2 tbsp xanthan gum
HERE is a good flour blend to use in these rolls.
★★★★★
Hello!!! Do you think I can use Rice Milk instead? My son can’t have any tree nut 😰
Hi Raquel, Yes, you can absolutely sub for the rice milk… I’ve done it before myself. Enjoy & God Bless! =) ~Erika
Hi,
I am wanting to use this recipe but don’t have an egg replacer. Is it ok to use flax egg as a replacement? Also the weather here is cool (in Australian standards, 20 degrees Celsius)is it ok to proof in this weather or do I need to proof in a warm oven? TIA
Hi,
Am I able to mix this without a stand mixer? I have borrowed one to try this recipe, but am unable to purchase one at this stage. Thanks!
Stand mixers are helpful for convenience, but a hand mixer would also do. You could also mix completely by hand, though that would take quite a bit longer (and it would be more difficult to get repeatable results). :)
Hello,
This may seem like an easy answer but how do I know when they are done on the inside? Thanks!
When they are brown and cracked and no longer gooey on the tops, they will be done on the insides too
These are incredible!! So easy to make and turned out perfect!
I used a almond/coconut blend milk, no pysllium husk
and instead of egg or replacer I just used about a tablespoon of Ground flaxseed straight into the dry mix. I was honestly so surprised it worked so well as I often find gluten free recipes fail. Will 100% be making again and again!
Had with “chicken” noodle soup on a snowy night, delicious.
Perfectly fluffy and a beautiful crunchy top.
Will be interested to see how they are tomorrow and if they get dense
I thought I would comment my modifiers for these since I know a lot of people read them to modify for their own dietary needs. I’m fructose, corn, dairy and gluten intolerant.
I use cashew milk for the milk in the yeast mix reduced by 1/4 cup (I use 1 egg instead of ener-g since I’m not vegan). I use Erika’s gluten free flour mix, but with the same amount of guar gum in place of xanthan gum in that recipe plus 1 extra tsp of guar gum in this recipe.
Follow the rest of the recipe as written. I proof the rolls for about 30 minutes, they won’t rise much, and then bake for 20 minutes or until brown and cracked on the tops.
They also freeze like a dream. I defrost in the microwave for about 90 seconds and they taste almost as good as the day they were made 😊
★★★★★
These were fantastic! Thank you so much for the recipe. They came out perfectly. Soft inside, crunchy outside, with a great flavor. I used the Bob’s Red Mill GF all purpose flour and egg replacer. I also used a hand mixer. Otherwise, I followed the recipe exactly. I can’t believe how easy they were! I’m definitely going to make them again and again.
★★★★★
I’m confused about the reduction of the 3 tablespoons of liquid.
2 tablespoons of oil
2 tsp vinegar
Now what should the measurement be? Because that doesn’t add up to 3 tablespoons. 🤔